Install PicoBoot
PicoBoot is considered an easy soldering modification. However, there is significant evidence online showing that inexperienced users can easily damage their console beyond repair. Do not overestimate your soldering skills. Practice soldering on scrap electronics before attempting this installation.
Required Materials
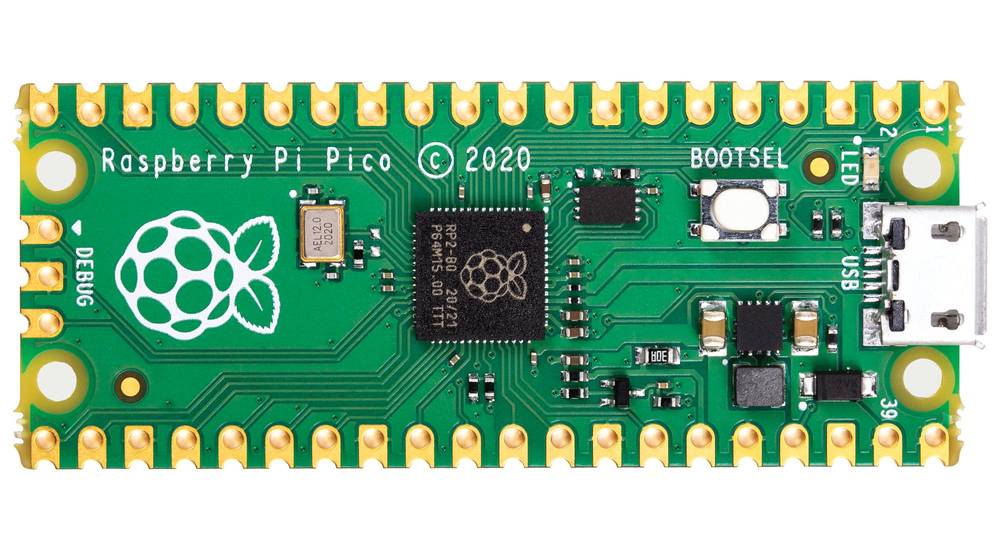
Raspberry Pi Pico board
Compatible boards:
- Raspberry Pi Pico (RP2040)
- Raspberry Pi Pico W (RP2040 with WiFi/Bluetooth)
- Raspberry Pi Pico 2 (RP2350)
- Raspberry Pi Pico 2 W (RP2350 with WiFi/Bluetooth) RECOMMENDED
Raspberry Pi Pico 2 W is the recommended board for new PicoBoot installations. It features a more powerful microcontroller (RP2350), increased RAM and flash memory, plus built-in WiFi and Bluetooth connectivity. These improvements may enable future feature enhancements. PicoBoot will continue to support Pico and Pico W boards (RP2040) for as long as possible.
Raspberry Pi Pico board
PicoBoot is compatible with all official Pico boards. The original $4 Pico is still great but consider Pico 2 W for future enhancements.
Buy on AliExpressSD card with an adapter
Get one of these adapters. SD2SP2 is usually preferred but make sure your console has Serial Port 2 (most DOL-001 models, DOL-101 and Panasonic Q are incomaptible). Following adapters are upgraded, semi-passive version which offers the best gaming experience. Both options now offer the same read speeds despite common beliefs on online forums.
If you source it from other stores make sure to look for the upgraded versions of these adapters. They are called semi-passive and come with a small chip on board. The difference is very noticeable in read speeds.
You also need an SD card, format it to FAT32 or exFAT. FAT32 is recommended for better compatibility with homebrew software.
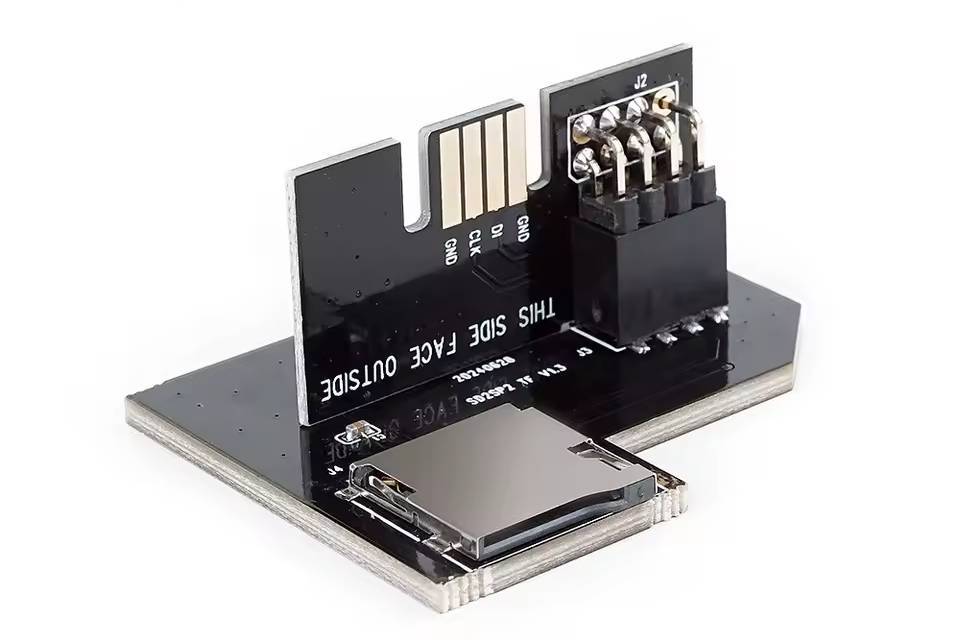
SD2SP2 v1.3 PRO
Semi-passive SD card adapter for DOL-001 Serial Port 2. Improved reading speeds.
Buy on AliExpress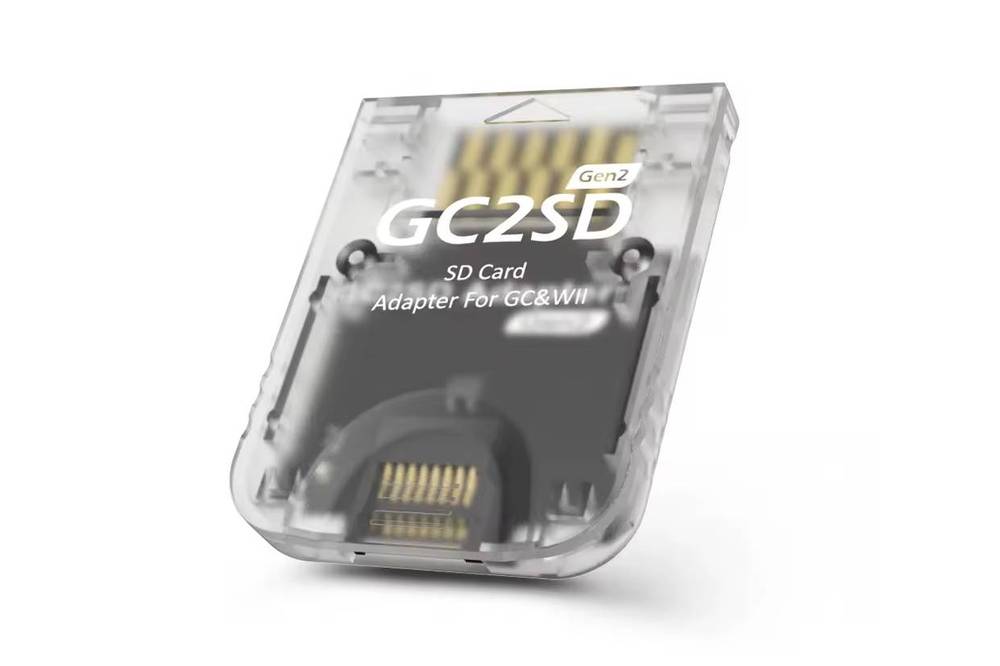
GC2SD
Alternative SD card adapter with semi-passive design. Inserted into Memory Card slot.
Buy on AliExpressOther supplies and tools
Soldering iron
Other supplies
Installation Steps
Flash the Raspberry Pi Pico
- Download correct UF2 file from the latest release
picoboot_full_pico.uf2: if you are using Raspberry Pi Pico or Pico W boardpicoboot_full_pico2.uf2: if you are using Raspberry Pi Pico 2 or Pico 2 W board
- Hold
BOOTSELbutton and connect the board to your computer - Look for
RPI-RP2orRP2350mass storage device - Drag and drop
*.uf2file onto the device - Wait for automatic ejection and green LED confirmation
- Unplug USB cable
Prepare the SD Card
- Format SD card to FAT32 or exFAT
- Download the latest Swiss version from releases page
- Rename
swiss_rXXXX.doltoipl.dol - Copy
ipl.dolto SD card root directory
Hardware Installation
Important Change: PicoBoot v0.4+ has updated wiring requirements and briding pins GP6 and GP7 is no longer required. New firmware is backwards compatible with legacy wiring but you should follow the new wiring diagram below.
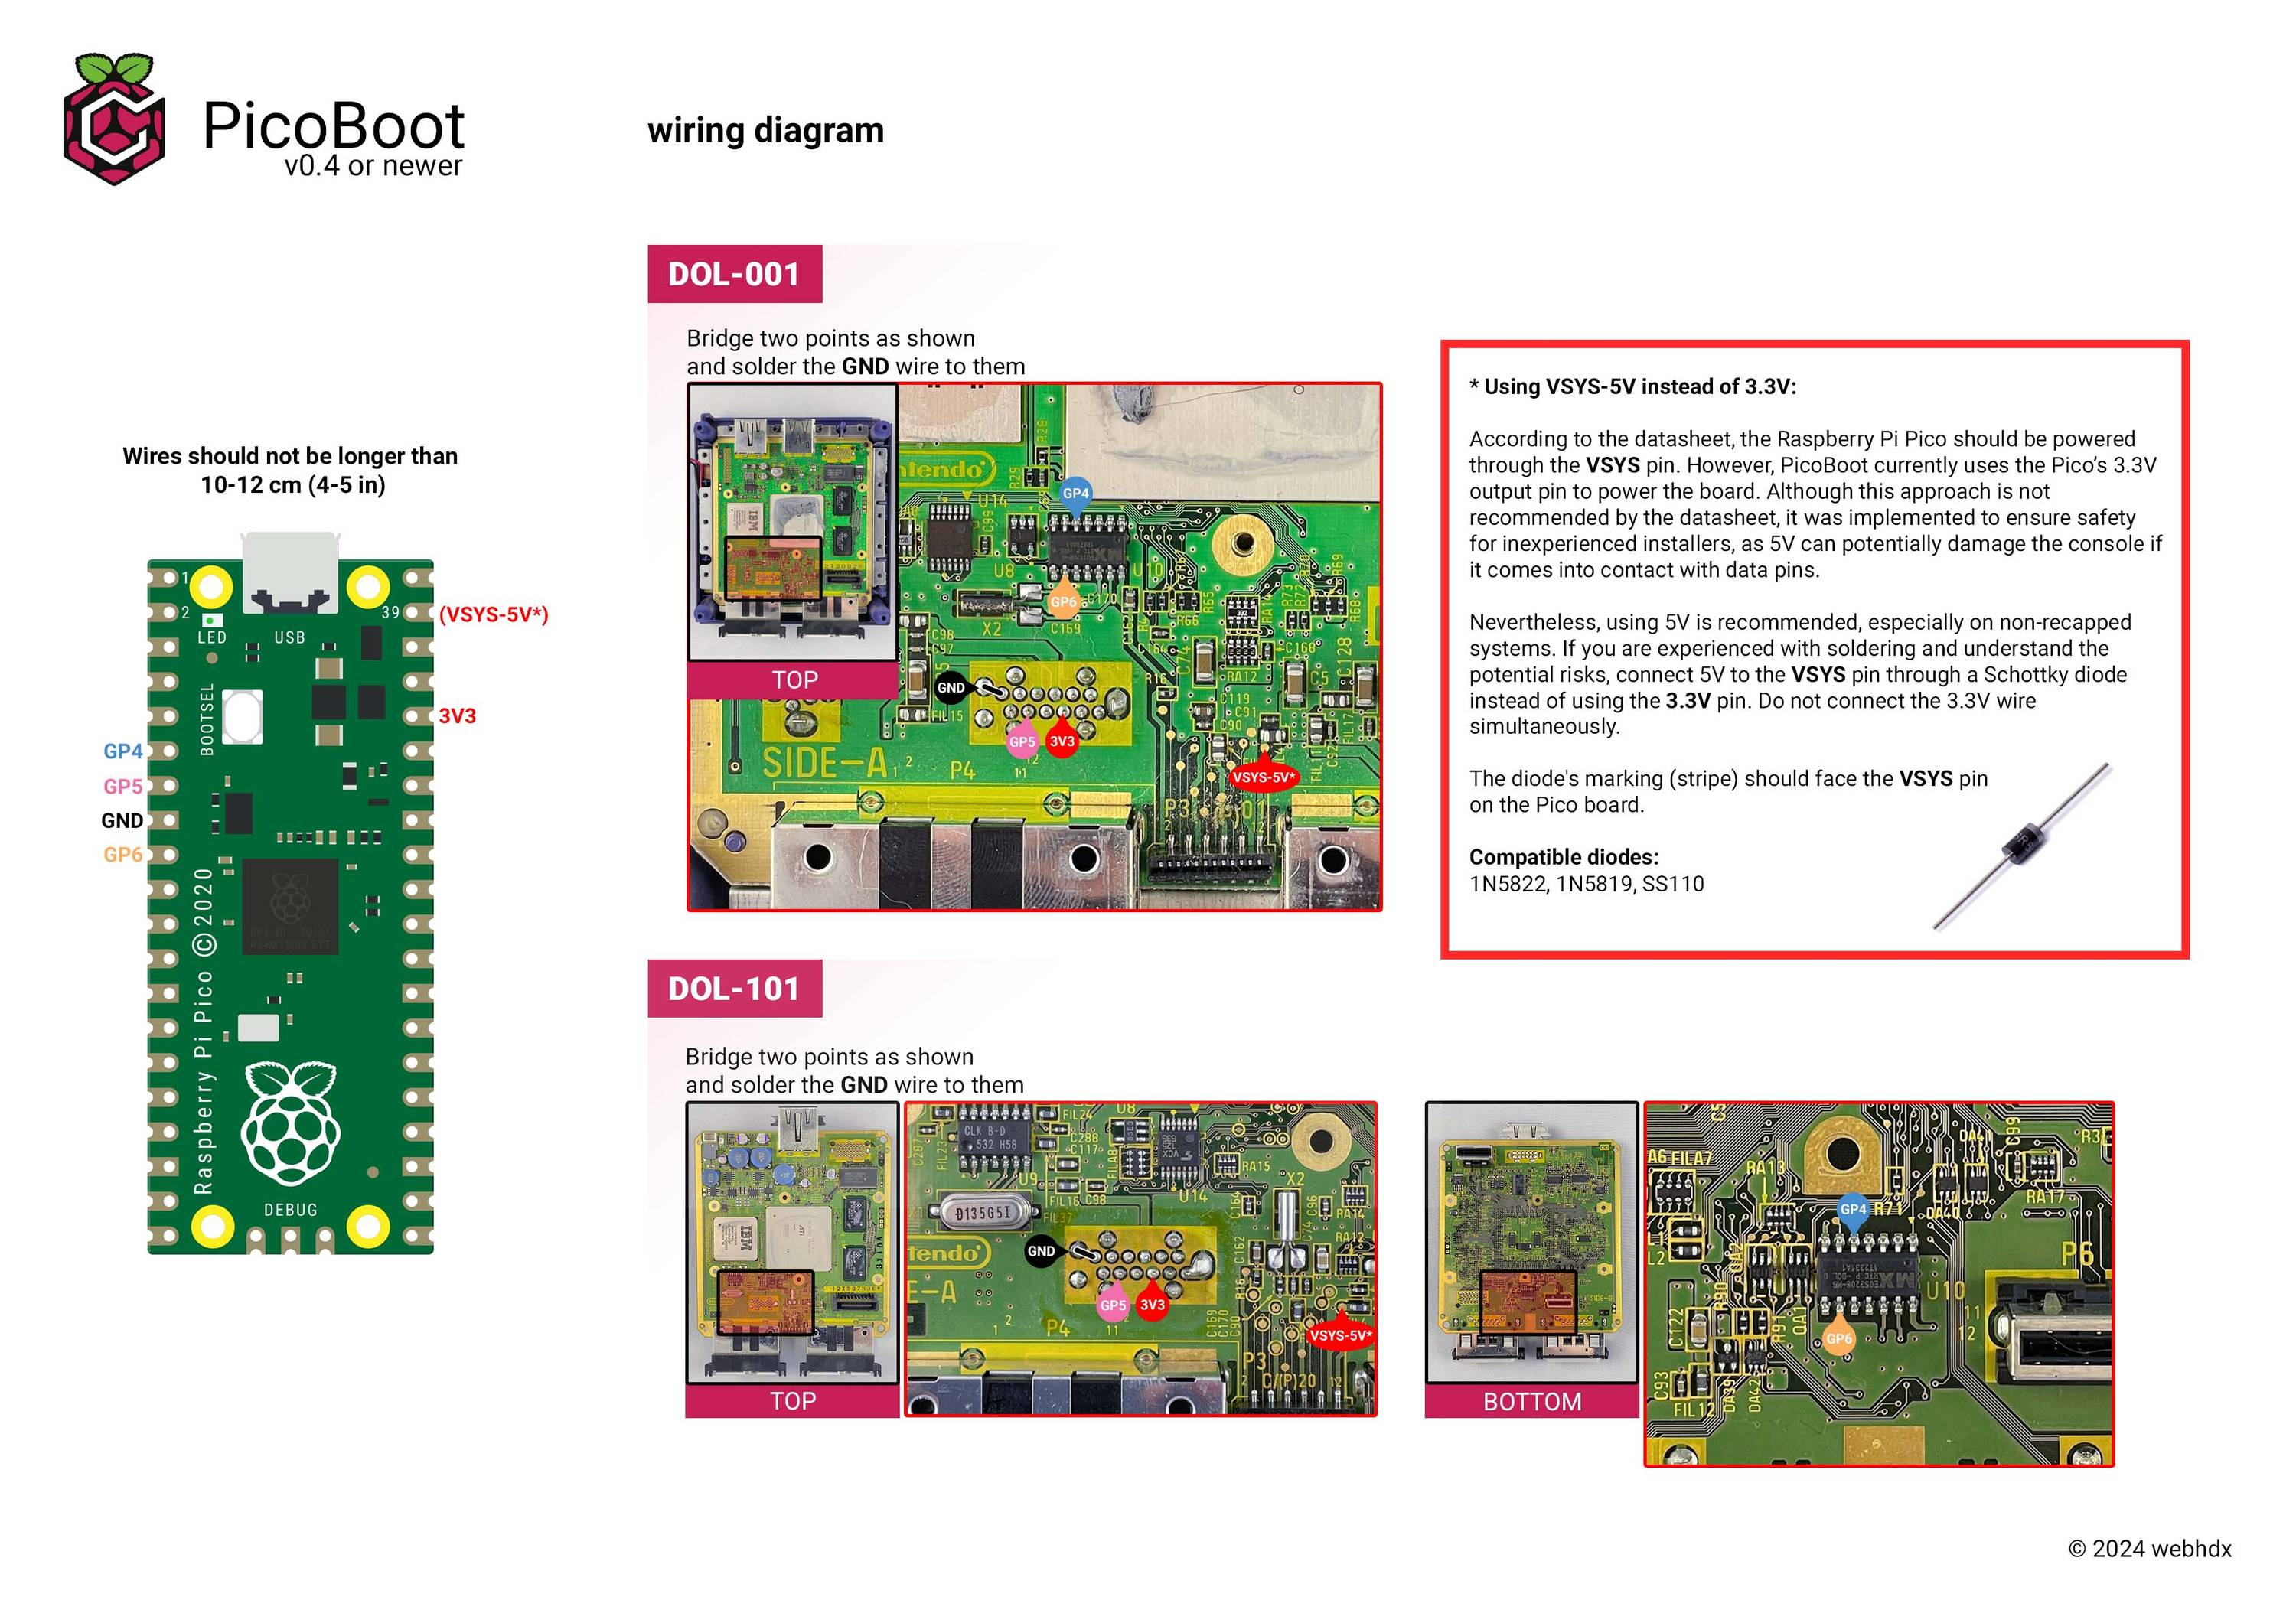
Installation Tips
- Mount PicoBoot on fan assembly or behind front controller plate
- Use only official Raspberry Pi Pico (W) or Pico 2 (W) boards
- For heatsink removal:
- Warm up console by playing a game for 10-15 minutes
- Gently twist heatsink back and forth, be careful not to damage DA15 component on the motherboard
- Avoid using prying tools
- After installation:
- Console should boot directly to Swiss or stop on gekkoboot debug screen
- If you see stock GameCube menu or nothing displays, refer to Troubleshooting Guide